"I hope that if I were to influence anyone it would influence people in the sense that you don’t have to draw the best or you don’t have to be the best to have a good time and if you’re lucky, make a living at what you enjoy doing."
Samwise Didier (Art Director at Blizzard Entertainment)
This post will focus on briefly showing you the creation process for our first character. We will start from the concept (that we already shared with you in our previous post) and go right through to the final low poly model.
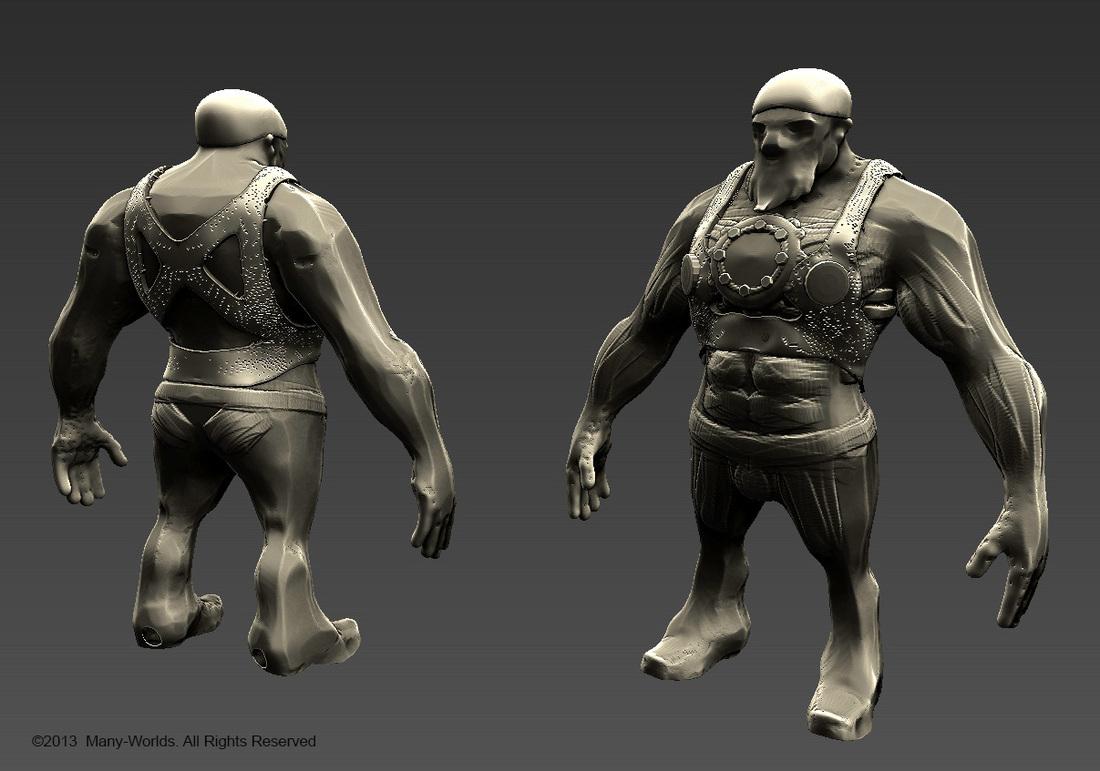
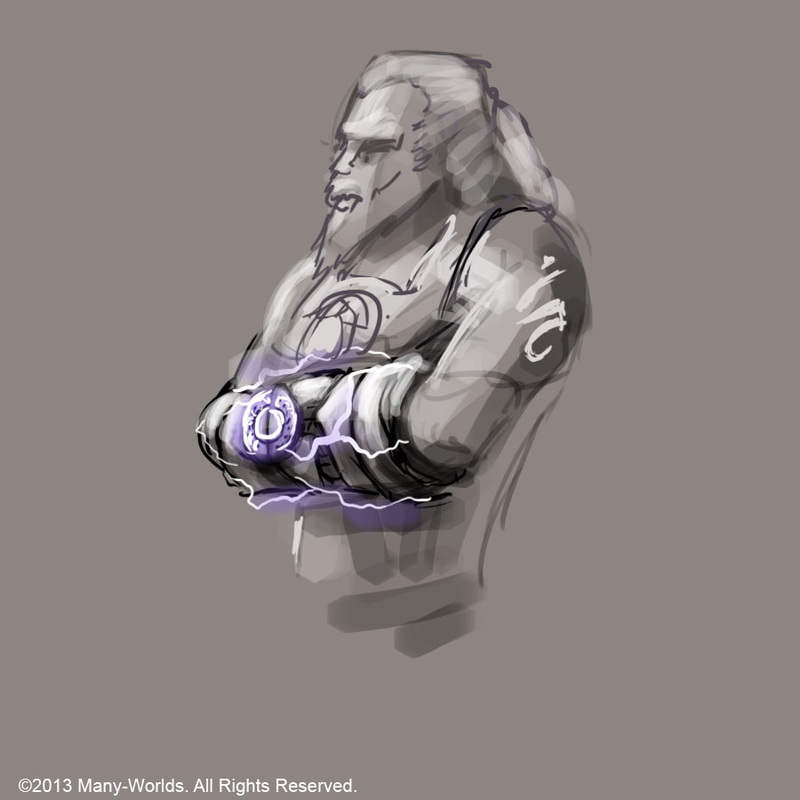
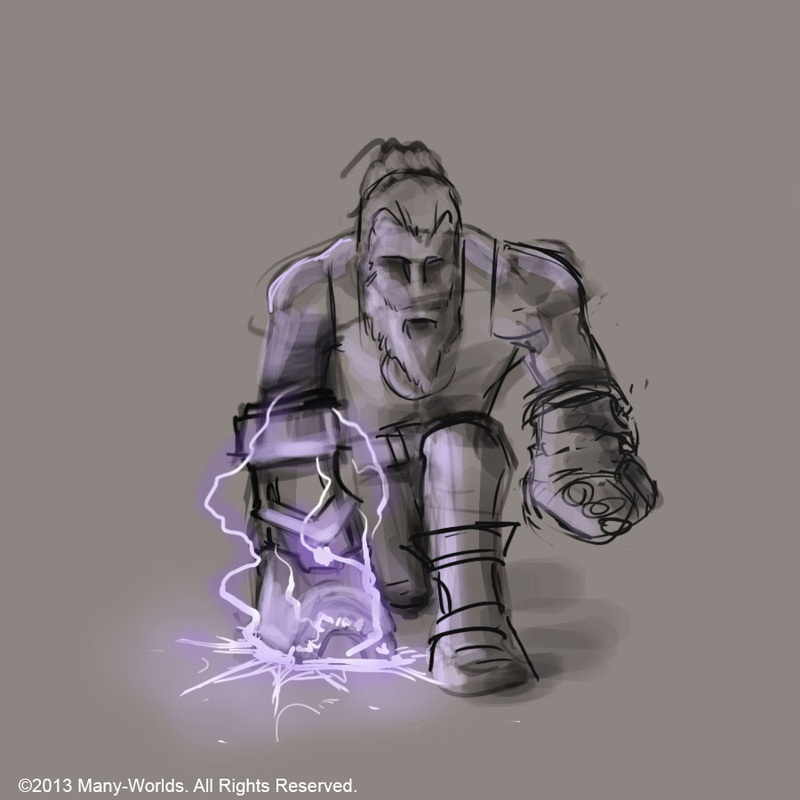
First of all, in this preview, you will see a small part of the sculpting process that we followed to create the character. Just as if we were molding the character out of clay, Rune Carver is gradually taking shape.
First of all, in this preview, you will see a small part of the sculpting process that we followed to create the character. Just as if we were molding the character out of clay, Rune Carver is gradually taking shape.
Workflow
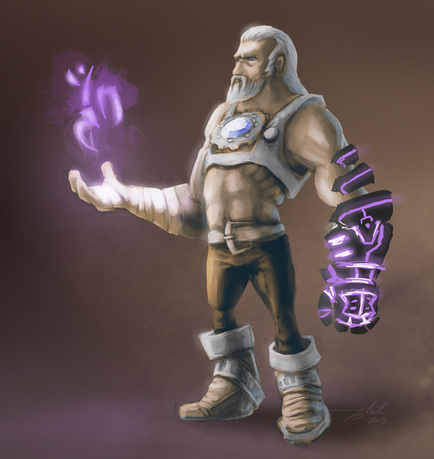 Concept Art
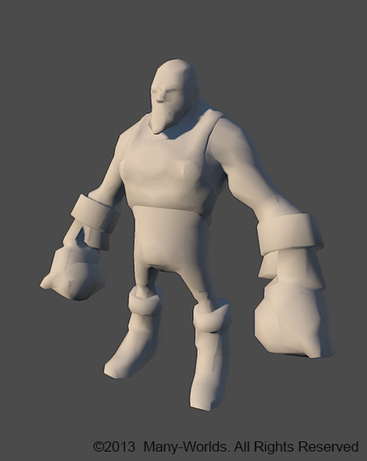
 Starting from the concept art we’ve talked about before, which is very important when defining our character, we start by creating a simple shape using sculpting software.
Once we have this base, we separate off from the rest of the body the more important pieces and those pieces that will later be interchangeable – in this case fists –, and then we start adding the details.
As you can see in the video, the process used in this kind of 3d modeling software is very similar to clay molding. We have tools that we can use to add base material, to make holes, as well as different pencils, etc. so we don't really need to worry about polygonal modeling.
Sometimes, people prefer to start modeling the low poly character and add detail at later date, but in my experience, the artist will have more freedom working with sculpting software that has no polygon restrictions.
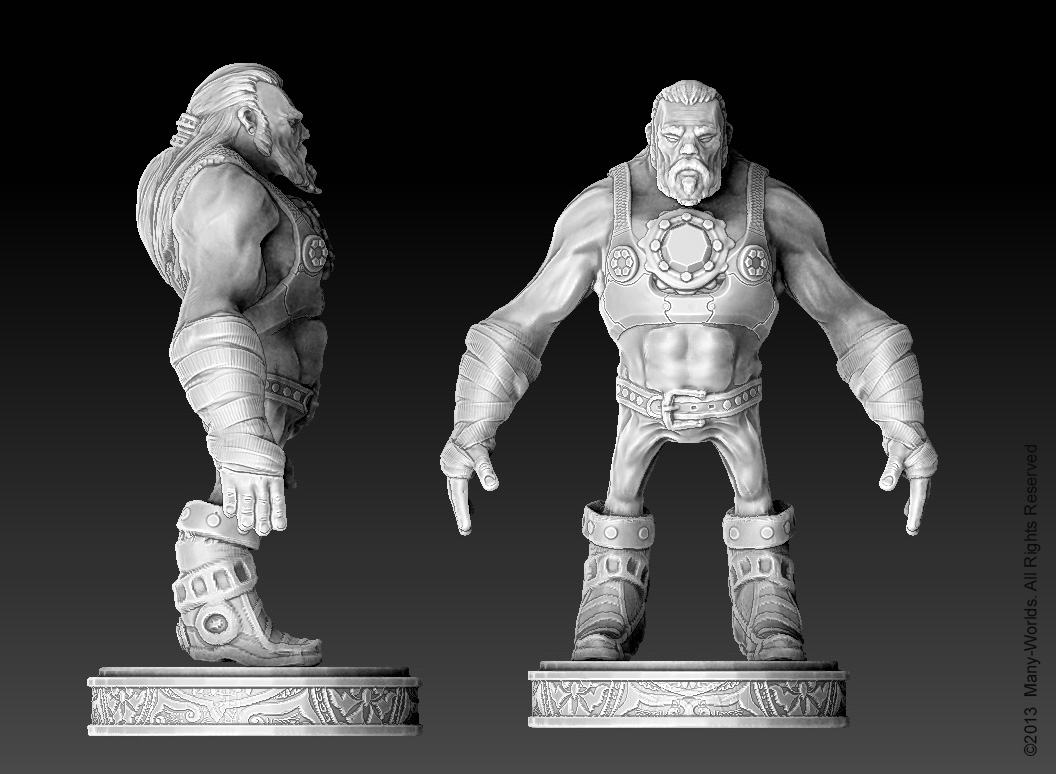
Modeling process

Paint and color
Once we have finished modeling the Rune Carver, the next step is to add some color. We paint over the mesh itself using the vertex color. In this way, we don’t need to unwrap the model to carry on.
It is often said that "the order of factors does not alter the product", so some people might prefer to create the low poly model with UV unwrapping in the first place, and then project the high poly model before texturing.
It is often said that "the order of factors does not alter the product", so some people might prefer to create the low poly model with UV unwrapping in the first place, and then project the high poly model before texturing.
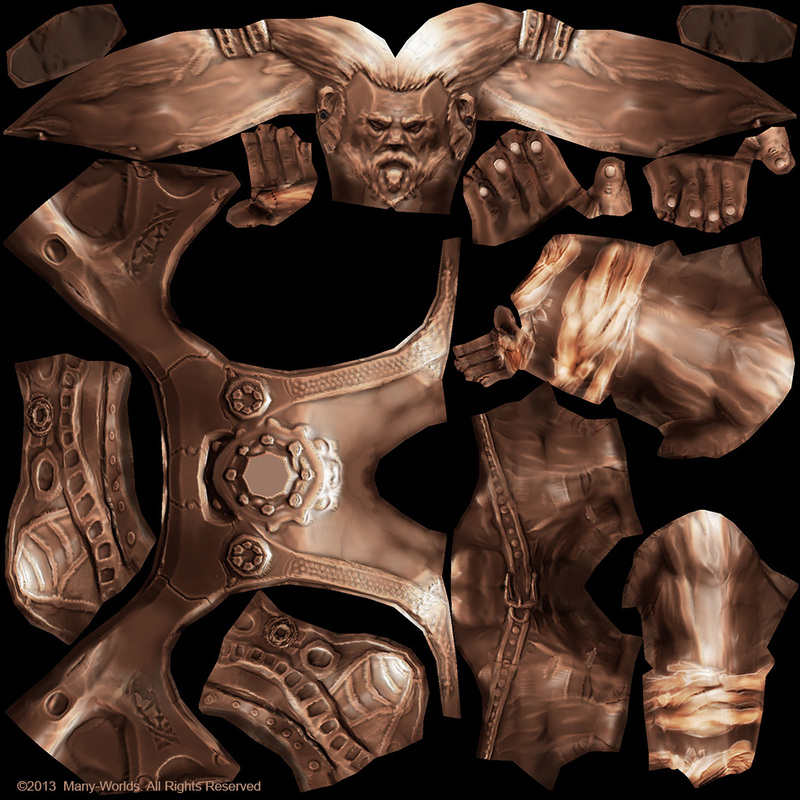
Color texture map – early stages (unwrapped)
Mapping and low poly modeling.
 Low poly mesh
 When we have our high poly character finished and painted, it is then time for the retopology process.
In this process, we take a model with very few polygons. The starting point is a mesh with several million polygons and we need another one that we will be able to use in real time rendering that has about a thousand polygons. To achieve this, we use the high poly model as a support for the new model in order to then "paint" the new mesh over the old one.
Based on the high poly character, we project all of the details on the new low poly mesh in such a way that all the additional information remains printed on a texture map. By using colors, we can then express the direction of the normals that will affect the direct lighting of our mesh.
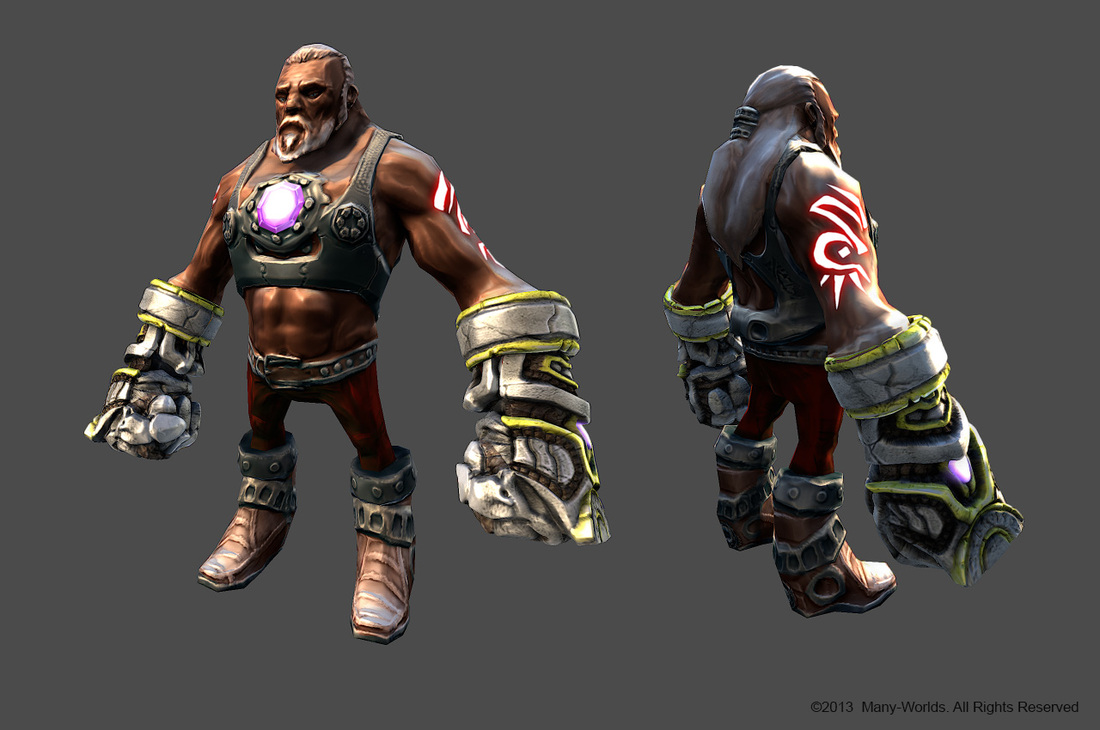
By using this technique, we end up with a model that has about one thousand polygons, and a very similar result to the high poly one that has millions of vertices. This model is now ready to be rendered in real time into the game engine – just take a look at the image below.
In this process, we take a model with very few polygons. The starting point is a mesh with several million polygons and we need another one that we will be able to use in real time rendering that has about a thousand polygons. To achieve this, we use the high poly model as a support for the new model in order to then "paint" the new mesh over the old one.
Based on the high poly character, we project all of the details on the new low poly mesh in such a way that all the additional information remains printed on a texture map. By using colors, we can then express the direction of the normals that will affect the direct lighting of our mesh.
By using this technique, we end up with a model that has about one thousand polygons, and a very similar result to the high poly one that has millions of vertices. This model is now ready to be rendered in real time into the game engine – just take a look at the image below.
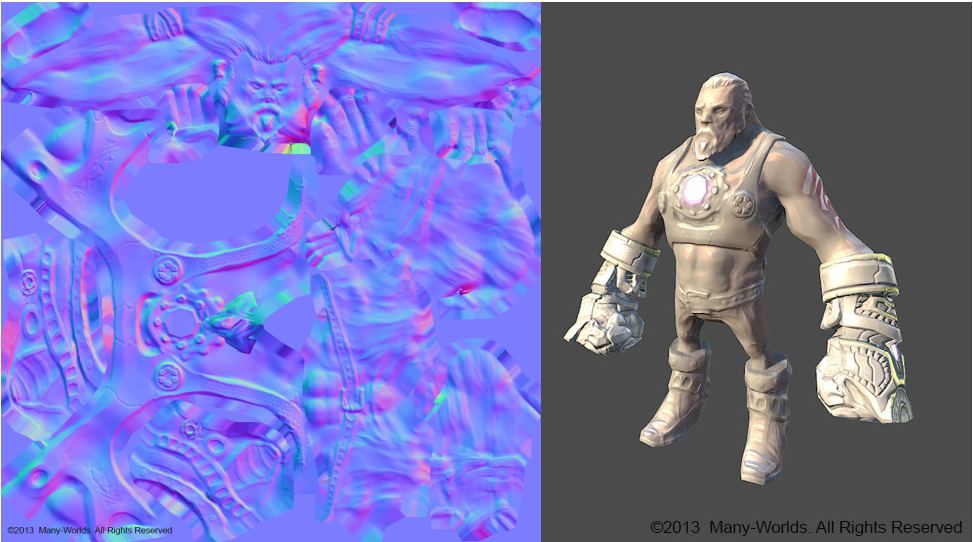
Normal map / Normal mapped low poly mesh
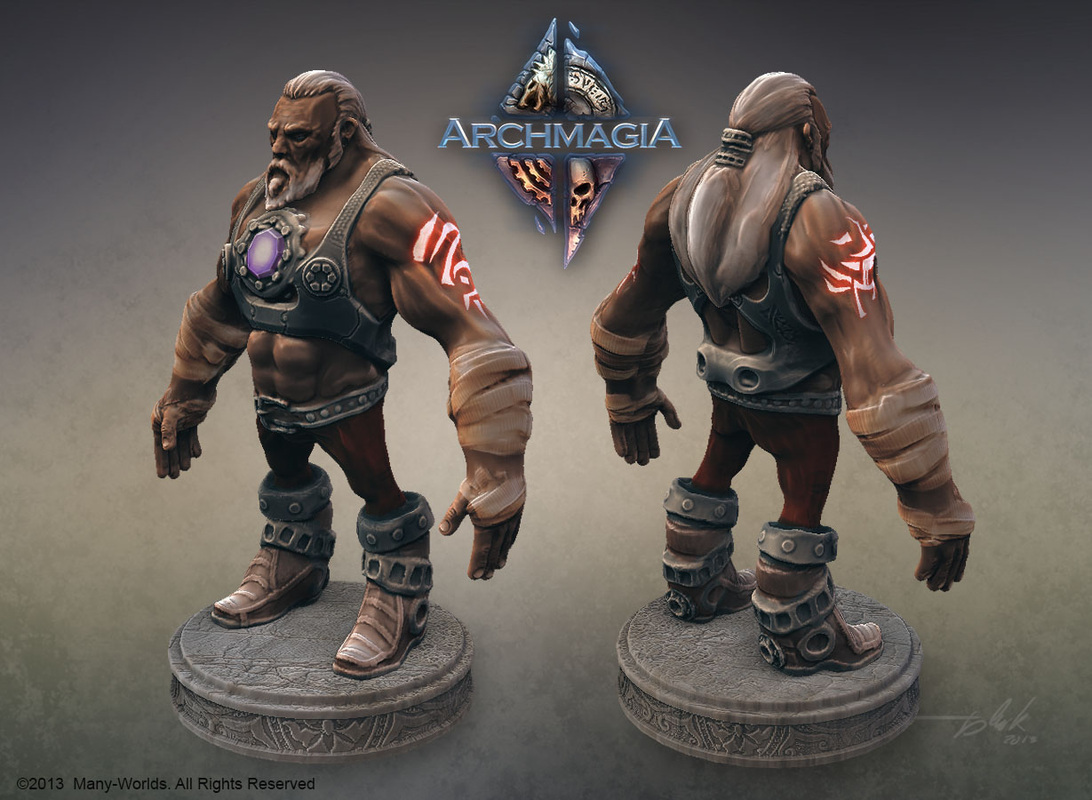
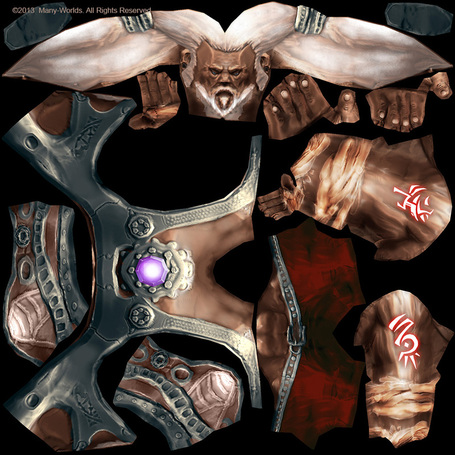 Final color texture
 Once we get to this point, we still have to unwrap the mesh mapping and project the high poly model onto the low poly one in order to extract the different texture maps, such as the color map, normal map, etc. We finally add the additional maps we might need, like the emissive light map, so that our character will be ready for the next step: rigging and animation.
To complete the Rune Carver, we just finish off the different texture maps using external software to paint the details so that we achieve the proper result.
To complete the Rune Carver, we just finish off the different texture maps using external software to paint the details so that we achieve the proper result.
Low mesh / Normal mapped low / normal & color low
Rocket punch!
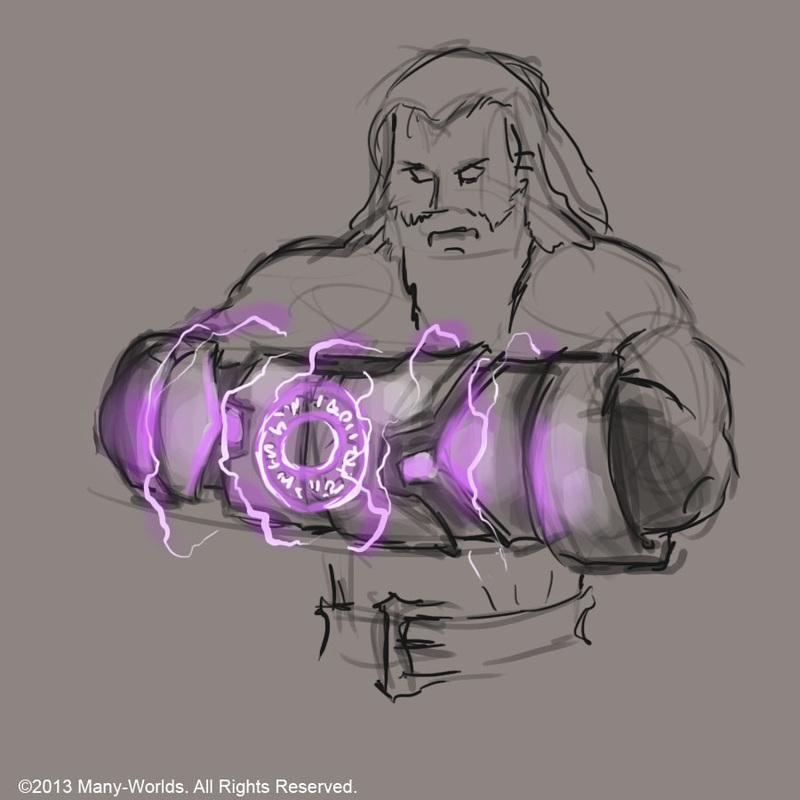
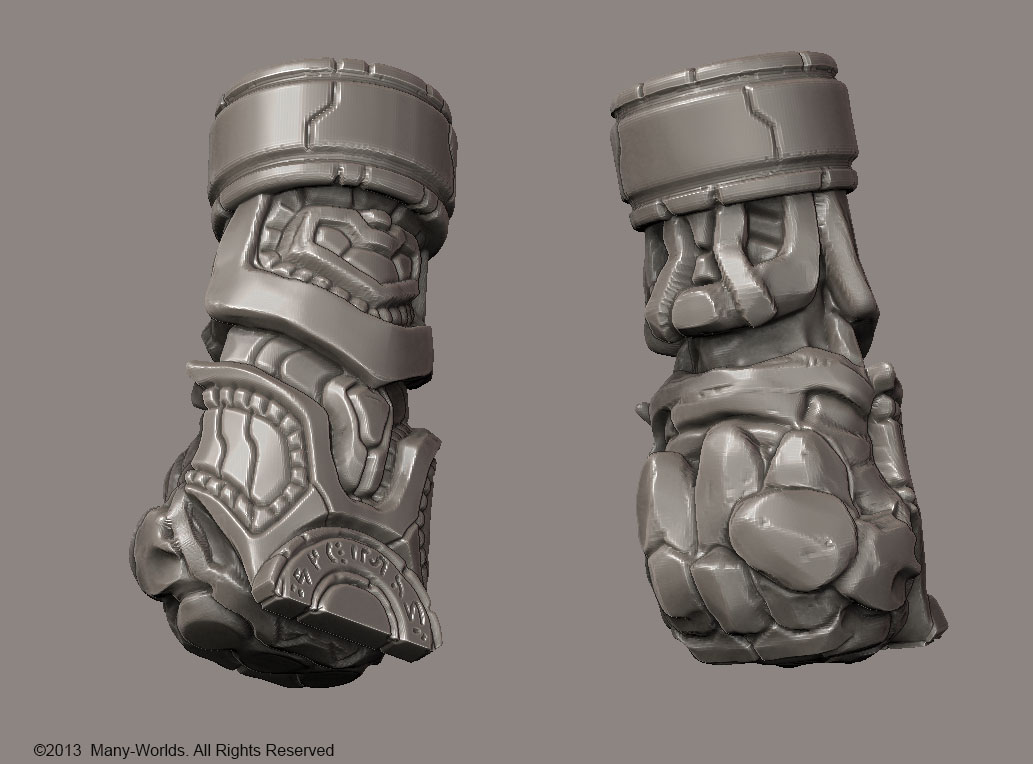
Detail of the modeling of the fists
In this case, runic fists were added after the Rune Carver was completed, as you can see by following the process shown in the images. This is because it will be an interchangeable element and therefore not an inherent part of the character.
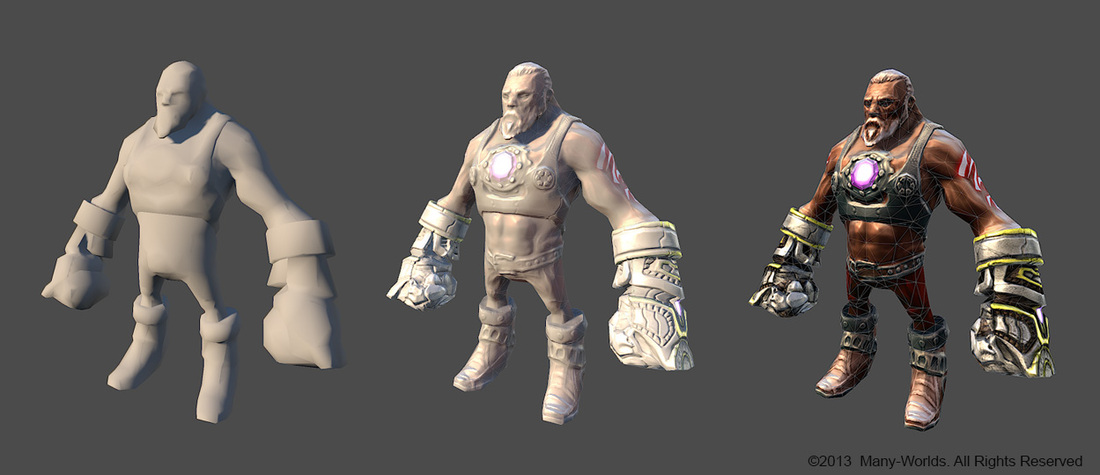
Before we sign off on this blog post, we wanted to share some more images with you that show the character in low poly, followed by a comparison between low/high modeling and a final high quality version of the character without fists.
Before we sign off on this blog post, we wanted to share some more images with you that show the character in low poly, followed by a comparison between low/high modeling and a final high quality version of the character without fists.

We really hope you have enjoyed reading this as much as we did writing it and we promise we will be back soon with some more cool stuff to tell you! As always, if you liked the post, please help us by sharing it! And remember, if you don't want to miss a post then make sure you subscribe to the blog – the way to do this is by clicking on the form in the right hand column.
Tell us your opinion in the comments!
The Many-Worlds team.


 RSS Feed